Saturday, December 16, 2017

2016 Christmas Goodies

Last year we tried two new recipes* to give as neighbor gifts. I typed this all up last year and never got around to sharing it! Now that it's Christmas again, it must be time! 
*Because you should always try new things when you want to share, haha....
(Actually, we made four different treats, but two are already on this blog.)
Fortunately they were both very yummy, and the recipes need to be kept!

The first recipe can be found HERE, and I'm copying the info to this blog in case it is ever deleted from the other. This one has a subtle flavor and should not be eaten immediately after the other treat, haha.... These are very light, and as stated in the original source, the perfect introduction to fall flavors. We've now made them twice since Christmas, so I'm okay eating it any time of year! This was possibly my favorite treat we shared this year.

Pumpkin Cheesecake Cookies:
Ingredients:
8oz cream cheese, room temperature
1/2 cup butter, room temperature
1/2 cup canned pumpkin (not pumpkin pie mix)
1 1/2 cups granulated sugar
1 tsp vanilla
2 cups flour
1/2 cup graham cracker crumbs
1 1/2 tsp pumpkin pie spice*
1/2 tsp cinnamon
1/2 cup graham cracker crumbs (for rolling the cookies in)
1/4 tsp pumpkin pie spice (optional)

*I don't have pumpkin pie spice. We did 1/2 tsp ground ginger, 1/2 tsp ground cloves and 1/2 tsp nutmeg

Directions:
In a large bowl, stir together cream cheese, butter and pumpkin until smooth. Add the sugar and vanilla until combined. Add the flour, 1/2 cup graham cracker crumbs, pumpkin pie spice and cinnamon. Mix until smooth. Scoop into balls and roll in the remaining graham cracker crumbs, which may include the optional pumpkin pie spice.
Place cookie balls on sheets lined with parchment paper (we use silpats). Bake for 15 mins at 350*. Remove from oven and flatten slightly, with your fingers or with the bottom of a glass. Bake three more minutes.
Allow to cool completely. Store in the fridge, just like cheesecake!
(the photo shows the dough balls rolled in chocolate graham crackers. Usually we've used regular. Both ways are delicious!)


The second recipe can be found HERE. It was possibly the family favorite. It has a much stronger flavor, and I wondered if my kids would even like it. HA. They definitely did!

Gingerbread Cookie Bars:
Ingredients:
1/2 cup butter, melted
3/4 cup granulated sugar
1/4 cup brown sugar
1/2 tsp vanilla extract
1/3 cup molasses
1 egg
2 tsp baking soda
2 cups all-purpose flour
1 Tbsp ground cinnamon
1/2 tsp ground ginger
1/4 tsp ground cloves
1/4 tsp ground nutmeg
1/2 tsp salt

Cream Cheese Frosting (or just dust with powdered sugar)
1/2 cup butter, softened
1 8oz pkg cream cheese, softened
1 lb (3 3/4 cups) powdered sugar
1 tsp vanilla extract

Preheat oven to 350*. Cooking spray all over a 9x13 inch baking dish. (I covered it in foil, and sprayed the foil).
In a large bowl, beat butter, sugar, brown sugar, vanilla and molasses on medium speed until creamy. Add the egg and stir until completely incorporated. Add baking soda, flour, spices and salt, and mix until well combined. Spread dough into prepared pan, using clean hands or a rubber spatula to press the dough to the edges of the pan.
Bake 15-20 minutes, do not overbake! Cool in pan, on a wire rack.
When bars have cooled, frost with cream cheese frosting or dust with powdered sugar. Cut into squares to serve.
If using frosting: (I recommend it!!)
Cream together the butter and cream cheese. Add the powdered sugar and vanilla. Slowly mix on low and then beat on high til light and fluffy.

ETA 12/23/18: This was a huge hit all three years we've made it and I have shared this link more than a couple times. So here's some tips. It is a very tacky dough when it's ready to go in the pan. I start with a rubber spatula, but I have to use my hands to smash it into the corners. When you pull it out of the oven it is puffy and as it cools it kind of sinks down the way it looks above, leaving you plenty of space for frosting.

Friday, September 29, 2017

Cheesy Chicken n' Ham Soup in a Bread Bowl

Ingredients Bread Bowl:
4 Cups White Bread Flour
3 Cups Stone Ground Wheat Flour
1 1/2 tablespoons active dry yeast
3 tablespoons sugar
1 tablespoon dough enhancer
2 1/2 cups warm water
2 teaspoons salt
2 tablespoons olive or vegetable oil
some butter to coat the hot bowls fresh out of the oven
grated Parmesan cheese to sprinkle on top of the buttered bowls

Soup Meat:
1 Ham Steak or 1 lb chopped cubed ham in 1/4 cubes
2 or 3 large chicken breasts (about a 1 1/2 lbs)
1/4 lb bacon for rendering and flavor

Soup Sauce:
1 onion diced
1 1/2 cups frozen mixed vegetables
3 tablespoons butter
3 tablespoons flour
1 1/2 cup chicken broth or stock
1/2 teaspoon salt
1/4 teaspoon black pepper
1 1/2 cups milk
1/2 cup apple or white grape juice
3/4 cup freshly grated Parmesan cheese
1 cup sour cream, light or regular

Feeds 8 people one full serving. 6 out of 7 family members really liked it.

Sunday, August 20, 2017

Fruit Yogurt Parfait

I saw this recipe ages ago on a Yoplait ad. I forgot all about it and then went thru the drafts on this blog and found it again. Sooo now that I've made it frequently for months, I'm sharing it!

This is what the original post said: 
"This Spiced Pear Yogurt Parfait with crunchy granola layers and a little bit of cinnamon is exactly what we need to bring in the holiday season.
To make: Layer a glass with your favorite granola (we used Nature Valley) and spoon Yoplait Greek 100 Vanilla yogurt on top. Sprinkle in chopped pear and repeat. Top with a little extra granola, cinnamon and pear then break out the spoons!"

So when I make it, I have used vanilla yogurt and I've used vanilla greek yogurt- whichever I get works fine. I have used Nature Valley granola, Cascade Farms granola and Kashi Go Lean. I like all of them. Most of the time I use chopped up bottled pears, but you can see I've used raspberries, peaches, and blueberries. I'm guessing any fruit will work great! When I use pears or peaches I add a dash of cinnamon.
Personally, I scoop up some yogurt, add the fruit and sprinkle on the granola, then I stir it up!
And it is delicious! I eat it anywhere from 3-7 times a week, sometimes as breakfast or lunch, sometimes as a snack! 


Sunday, August 6, 2017

Buttermilk Pancakes from Martha Stewart

This one is a keeper. Posting it here in case the recipe disappears from the website I got it from. Here's the original link in case anyone is wondering.

http://www.marthastewart.com/318689/best-buttermilk-pancakes

I have made these a few times and they have become a staple for pancakes in our house. Yes use real buttermilk. I have started keeping buttermilk on hand for various recipes especially pancakes, waffles, and southern style biscuits. I have done the soured milk thing when I have to, but I am finding that just keeping buttermilk on hand is the way to go. My experience is that you never have to throw the stuff away. I have kept it way past the expiration date even after it goes "sour" and used it in my cooking with no noticeable in flavor. Sometimes, I kidd you not, up to two or three months after it expired. It just seems to be thicker than when it was fresh from the store. If I need to, in those instances, I just thin it out a little bit with milk.

I like to make them smaller in diameter than the recipe recommends below, but to each their own.

INGREDIENTS

2 cups all-purpose flour
2 teaspoons baking powder
1 teaspoon baking soda
1/2 teaspoon salt
3 tablespoons sugar
2 large eggs, lightly beaten
3 cups buttermilk
4 tablespoons unsalted butter, melted, plus 1/2 teaspoon for griddle

Heat griddle to 375 degrees. Whisk together flour, baking powder, baking soda, salt, and sugar in a medium bowl. Add eggs, buttermilk, and 4 tablespoons butter; whisk to combine. Batter should have small to medium lumps.

Heat oven to 175 degrees. Test griddle by sprinkling a few drops of water on it. If water bounces and spatters off griddle, it is hot enough. Using a pastry brush, brush remaining 1/2 teaspoon of butter or reserved bacon fat onto griddle. Wipe off excess.

Using a 4-ounce ladle, about 1/2 cup, pour pancake batter, in pools 2 inches away from one other. Scatter with berries, if using. When pancakes have bubbles on top and are slightly dry around edges, about 2 1/2 minutes, flip over. Cook until golden on bottom, about 1 minute.

Repeat with remaining batter, keeping finished pancakes on a heatproof plate in oven.

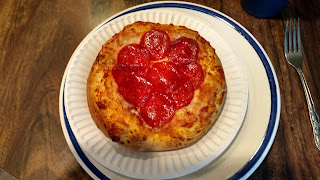
Homemade Pizza Dough and Sauce

Pizza Dough

2 1/2 Cups All Purpose Flour
2 Tbsp Vital Wheat Gluten
2 Tbsp Sugar
1 Tbsp Active Dry Yeast
2 Tbsp Dry Milk Powder
2 Tsp Salt or Onion Salt
2 Tsp Dough Enhancer
1 Cup Warm Water
2 Tbsp Olive Oil

Combine all ingredients (except sugar, yeast, and water) into bread maker and run on the dough setting. Proof yeast in water with the sugar. Water should be no more than 103 degrees. Let bread maker mix and knead the dough, but pull it out of the machine before it starts it's rising cycle. Continue to knead on the counter to create a strong gluten structure that can be stretched thin without tearing, about another 5 to 10 minutes. Dough should be sticky to the touch by not so sticky that its impossible to knead on an unfloured counter. After kneading put in an oiled bowl and cover with plastic wrap. Put it in the fridge to do a cold rise for at least 5 hours, but it could stay in there all day. Leaving it in the fridge to rise very slowly develops great flavor in the dough.

Makes 4 dough balls that can be turned into four 8" round pizzas.

Cook at 425 degrees for 15 mins for 8" pizzas, preferably on a pizza stone that was preheated in the oven. I haven't done a larger size pizza yet, but 15 to 20 minutes should do it in general.

Pizza Sauce

1 14.5 oz can of diced tomatoes
1 8 oz can of tomato sauce
4 oz of water (use water to rinse out tomato sauce can then add to the sauce)
1 Tsp of dried Sweet Basil
1 Tsp of dried Oregano
1 Tsp of dried Parsley
2 Tsp Salt or Onion Salt
1 Tsp of Onion Powder (leave out if using onion salt)
2 Tsp of Granulated Garlic or 1 Tbsp of Minced Garlic
2 Bay Leaves
1 Tbsp Olive Oil

Dump all of the ingredients except bay leaves into blender and puree until smooth. Pour contents into sauce pot on stove and add bay leaves.  Bring to a near boil then reduce heat, cover and simmer until the sauce reduces by a bit and looks all saucy. About 10 to 15 minutes should do it. Cool down or refrigerate until needed. Sauce stores well in the fridge. Makes enough sauce for about 12 8" pizzas. Use within about 30 to 60 days or divide into thirds and freeze.


Thursday, May 25, 2017

Slow Cooker Chicken Enchilada Casserole

Well, I had a baby and moved twice sooo there were very few recipes tried and even less blogging happening. Maybe this summer I can catch up...! And since I'm ready to make this a second time, here you go!
~~~
You know those videos on facebook of a recipe being thrown together? That's where this came from.
The actual link to the recipe is HERE.
We made some modifications, haha. As in, we added three ingredients. But here's how we did it:

Ingredients:
2 huge chicken breasts
30 oz enchilada sauce
6 oz olives, sliced
1 cup cheese
1/2 cup chopped yellow or white onion
1 can black beans
6oz ish corn
12 corn tortillas (I cut these in half then cut the halves into short strips)
top with more cheese and olives
Directions:
Put thawed chicken into crock pot, cover with enchilada sauce. Cook on high for 4 hours.
Shred chicken with forks, in pot.
Add sliced corn tortillas, cheese, olives, black beans, corn and onion. Stir.
Add enough cheese to cover the mixture and olives on top.
Cook 40 more minutes

Serve with sour cream, lettuce and salsa.


*I like to use an egg slicer to cut olives. Three fit in the cuppy spot perfectly and come out easily! 
YUM!

Sunday, January 15, 2017

Burt's French Toast

For the batter:
  • 6 eggs
  • 1/2 cup half & half
  • pinch of salt
  • 1 tsp vanilla
  • 2 tbsp buttermilk
  • 1/8 cup brown sugar
  • cinnamon & nutmeg (as much as you'd like)
Put all of the ingredients in to a nice wide bowl and whisk to combine. The batter should have a nice uniform yellow color that will remind you of egg nog. (BTW, you can replace the half & half with egg nog, be sure to add a couple of tablespoons of milk to thin the egg nog. Also you can leave out the vanilla, buttermilk, and nutmeg.)

This amount of batter should be enough for 12 to 13 slices of regular sandwich bread, about 8 slices of Texas Toast, or about 10 slices of french bread cut to a 3/4 inch thickness.

For best results, be sure to dry bread out so that the outsides of the bread are dry to the touch, but the interior of the bread is still soft. About 12 minutes in a 225 degree oven should do the trick. Place the bread in half sheet pan on a cooking/cooling rack that fits inside the pan. Flip the bread slices after about 6 minutes so both sides dry evenly.

If you don't have the rack that fits inside a half sheet pan then put the bread directly onto the oven rack arranging them in such a way that they don't fall through. When placing the bread directly onto the oven rack it won't be necessary to flip them.

After you take the dried bread out of the oven, turn it down 200 degrees and leave in/put a half sheet pan inside. If you have a cooking/cooling rack leave that in the pan too. As the toast comes out of the frying pan or griddle, you will put them in the oven to finish cooking the interior of the toast.

Heat up a non-stick frying pan on medium heat. Right before you put a piece of soaked bread into the pan to cook use a little spray oil on the part of the pan where the bread will go. This will ensure the bread won't stick. If you have one, an electric griddle is ideal for this because you will be able to fry multiple slices of toast at one time. Since the toast goes into the oven to finish, bigger batches will help ensure that all of the slices don't overcook and dry out before all of the slices are done.

Cooking the French Toast

Step 1: Put the dried bread into the batter and let soak on each side for a few seconds. You want the liquid to penetrate to the middle of the bread. Drying out the bread before hand ensures that you let the bread soak, but won't turn into a soggy mess when you try to put it in the pan.

Step 2: Cook on each side until the side is a mostly uniform golden brown. This should take about 3 to 5 minutes per side. If it takes longer than that your pan may be too cool. If your toast gets darker than that in that time, turn the temperature down. You can even wave the pan through the air to cool it down between batches a little.

Step 3: Put the cooked slices into the heated oven on the half sheet pan to continue slowly cooking the interior of the toast while you finish the rest of the slices. They only need about 7 minutes in the oven before they are ready to serve.

Take them out of the oven warm, cover with whatever (butter, syrup, etc) you'd like and enjoy!

I'll add pictures to this post next time I make french toast.